本文是Selenium WebDriver来自动化微信进行消息收发系列文章之一,介绍Selenium WebDriver的基本用法。
目录
- WebDriver简介
- Driver基本设置
- 浏览器操控
- 等待
- 处理JavaScript的alert、prompt和confirm
- 设置HTTP代理
- 页面加载策略
- WebElement
- 键盘操作
- 其它功能
- 鼠标操作
- 处理cookie
- Chrome的开发者工具(Devtools)
- XPATH教程
- 其它常见问题
WebDriver简介
Selenium是一个项目集合,用于浏览器的自动化。它可以模拟(emulate)用户和浏览器的交互,支持分布式的服务来同时运行多个浏览器。它同时也是W3C WebDriver规范的主要推动者,这个规范使得我们可以用标准的API来驱动主流的Web浏览器。在WebDriver规范出现之前,因为测试的需求,很多第三方开发者针对不同的浏览器实现了不同程度的驱动。但是由于浏览器的实现机制和开放API程度不同,很难有统一的方式来驱动它们。这就给测试带来很大的麻烦:我们实现了一个Web前端时需要测试各种主流浏览器,人肉手动测试的成本很高,用脚本实现自动化控制会让测试轻松很多。但是如果每个浏览器都需要分别编写不同的脚本,那也非常痛苦。
为了解决这个问题,在Selenium项目及相关人员的推动下就出现了W3C的WebDriver规范。它定义了去掉浏览器的标准API,而各家主流浏览器厂商(而不是第三方开发者)实现这个规范API。
理解基本概念
首先统一一下术语:
- API
- Application Programming Interface(应用程序接口),这里可以理解为WebDriver规范定义的可以控制浏览器行为的各种命令(Command)
- Library
- 实现某些API的代码库。代码库是和语言绑定的,比如java的jar包,.Net的dll
- Driver
- 浏览器的控制器。通常是由浏览器厂家自己来实现WebDriver规范。Driver通常和浏览器运行在一台服务器上,而Driver的client(也就是我们的测试或者控制代码)不一定和它们在一台机器上。我们的代码通过Driver来控制浏览器,因此Driver也被认为是我们用于控制浏览器的代理(Proxy)
- Framework
- 测试的框架,比如JUnit或者NUnit。包括更加先进的类自然语言测试框架如Cucumber和Robotium。
结构图
最简单的用法如下图所示:
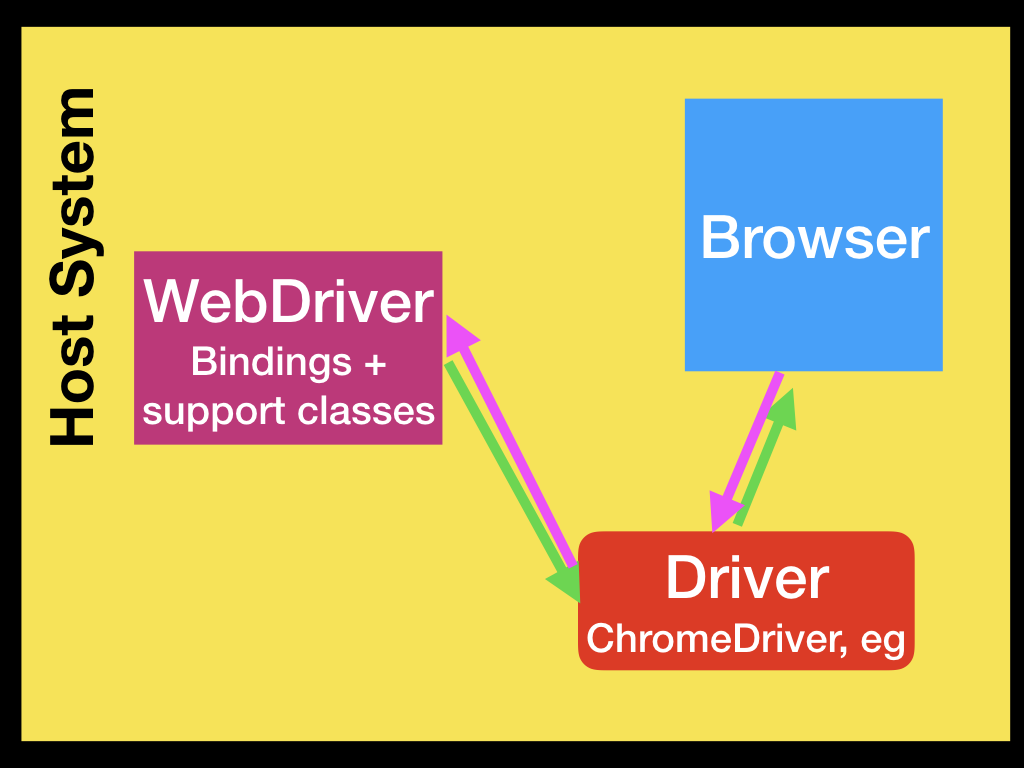
我们使用某种语言的WebDriver客户端(binding)利用WebDriver实现浏览器的控制。这里的通信是双向的:客户端通过WebDriver向浏览器发生命令,而浏览器把执行命令的结果通过WebDriver返回给客户端。
不同的浏览器的Driver是不同的,比如Google的Chrome/Chromium使用ChromeDriver,Mozilla的Firefox使用GeckoDriver。Driver和浏览器运行在同一个系统(机器)上。而你的测试代码(或者说客户端)不见得要和他们在一起,客户端(WebDriver)可以通过网络实现与Driver的通信。比如下图的结构:
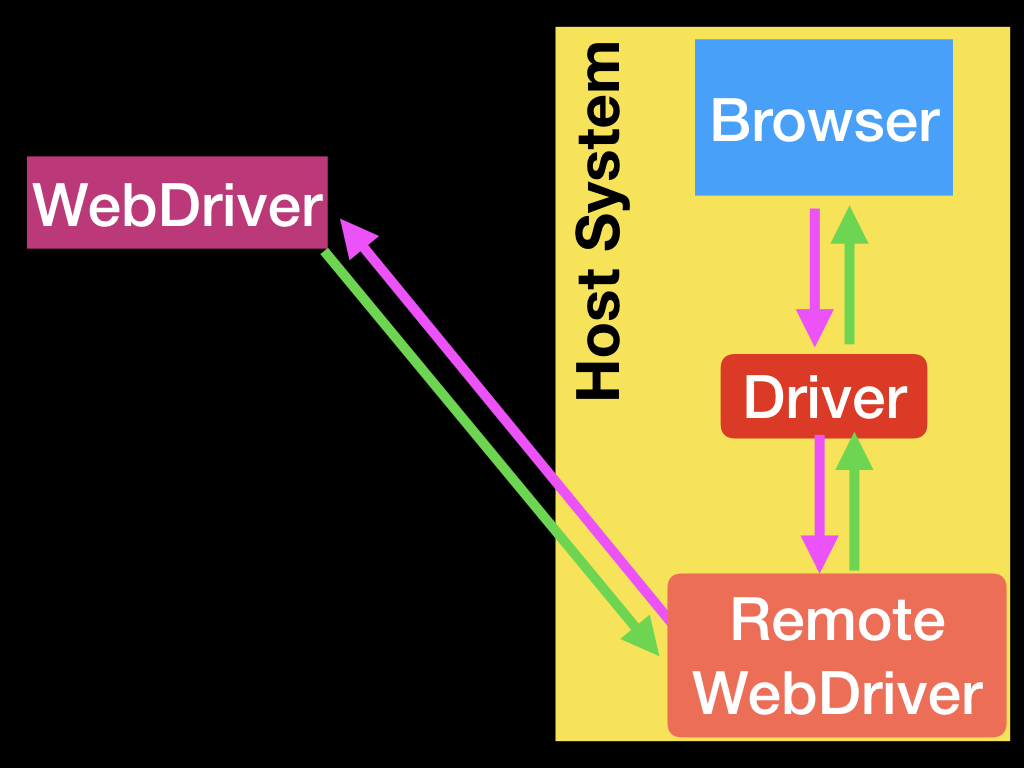
上图中WebDriver通过网络和Remote WebDriver通信,Remote WebDriver再和Driver通信。
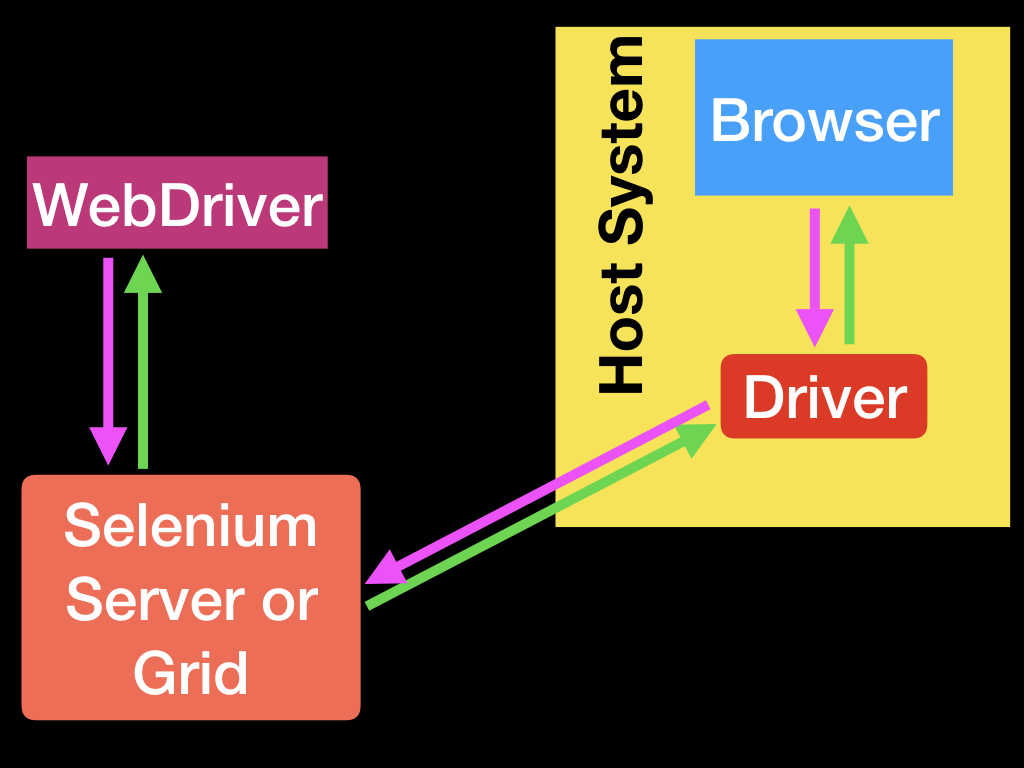
更加复杂的场景下,Remote WebDriver也可以是单独的服务器,比如Selenium Server和Selenium Grid。如下图所示:
测试框架的位置
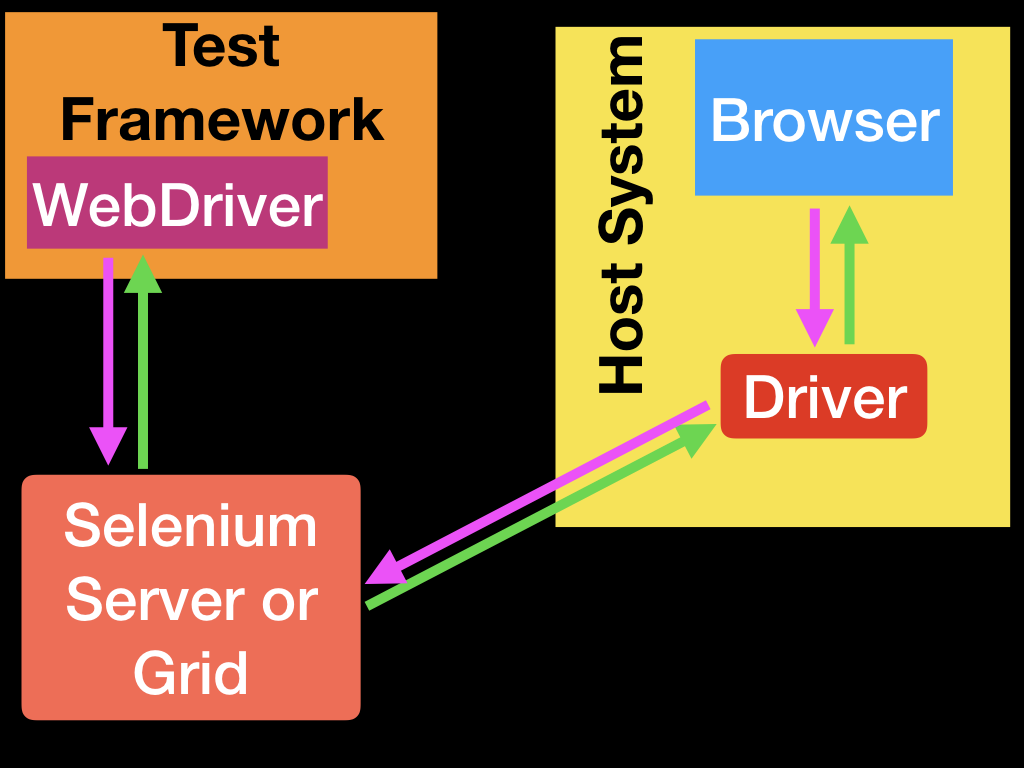
WebDriver的唯一作用就是遵循W3C的WebDriver协议控制浏览器并且把执行结果返回给客户端,它并不知道什么单元测试或者集成测试。所以测试的框架会集成WebDriver客户端来实现自动测试的功能,如下图所示:
Driver基本设置
虽然WebDriver提供了统一的API,但是不同的浏览器的实现方式有较大区别,不同Driver有不同的设置,本节介绍所有浏览器都需要的基本设置。
添加Driver程序到PATH环境变量
大部分Driver都有一个可执行的程序来启动并且进行控制。我们可以在代码里手动知道它的路径(后面会看到),但是这样的硬编码让代码比较难看。为了方便,我们可以把Driver程序所在的目录加到PATH环境变量里。比如我们下载的Chrome的Driver放到了/opt/WebDriver/bin,则可以这样:
export PATH=$PATH:/opt/WebDriver/bin
接下来我们就可以运行这个Driver:
$ chromedriver
Starting ChromeDriver 86.0.4240.22 (398b0743353ff36fb1b82468f63a3a93b4e2e89e-refs/branch-heads/4240@{#378}) on port 9515
Only local connections are allowed.
Please see https://chromedriver.chromium.org/security-considerations for suggestions on keeping ChromeDriver safe.
ChromeDriver was started successfully.
不同浏览器的Driver下载为:
| 浏览器 | 支持的操作系统 | 维护者 | 下载 | 问题追踪 |
|---|---|---|---|---|
| Chromium/Chrome | Windows/macOS/Linux | Downloads | Issues | |
| Firefox | Windows/macOS/Linux | Mozilla | Downloads | Issues |
| Edge | Windows 10 | Microsoft | Downloads | Issues |
| Internet Explorer | Windows | Selenium Project | Downloads | Issues |
| Safari | macOS El Capitan and newer | Apple | Built in | Issues |
| Opera | Windows/macOS/Linux | Opera | Downloads | Issues |
作者这里会使用Chrome浏览器,所以这里只介绍Chrome/Chromium相关的设置。其它浏览器的设置可以参考官方文档。
首先去这里下载Driver,注意查看自己Chrome的版本,然后选择合适的Driver。作者的Chrome是Ubuntu下的86.0.4240.198,所以下载的是最新的ChromeDriver 86.0.4240.22。请根据自己的操作系统下载对于的文件,作者下载的是chromedriver_linux64.zip。解压后就是一个chromedriver可执行程序。
使用的方法也很简单:
import org.openqa.selenium.WebDriver;
import org.openqa.selenium.chrome.ChromeDriver;

WebDriver driver = new ChromeDriver();
因为我的Driver没有放到PATH里,所以还需要手动指定:
System.setProperty("webdriver.chrome.driver", "/home/lili/soft/chromedriver");
在使用时需要引入依赖,如果是Maven的话加入:
<dependency>
    <groupId>org.seleniumhq.selenium</groupId>
    <artifactId>selenium-java</artifactId>
    <version>3.141.59</version>
</dependency>
其它语言的客户端请参考官方文档。
浏览器操控
基本控制
浏览网页
控制浏览器的第一件事情就是浏览某个url,代码如下:
//简便的方法
driver.get("https://selenium.dev");

//复杂的方法
driver.navigate().to("https://selenium.dev");
注意:虽然我们输入的是一个url,但是实际上会下载很多css/js/image得到各种文件。比如我们打开stackoverflow的首页,用Chrome的Inspector的网络Panel就能看到实际下载了哪些内容:

因此如果想用控制浏览器的方式来实现爬虫的话成本是比较高的,可以在其它的方法都无法搞定的时候尝试。另外作为爬虫的话,可以禁用掉图片等一些无关内容的下载,参考Python: Disable images in Selenium Google ChromeDriver。
得到当前的url
有的时候浏览器会发生302之类的跳转,我们想得到跳转之后的url,可以使用:
driver.getCurrentUrl();
后退和前进
driver.navigate().back();
driver.navigate().forward();
刷新
有的时候网络会失败,可以刷新重试:
driver.navigate().refresh();
得到HMTL的title
driver.getTitle();
当然我们可以用XPATH从HTML提取title,但是因为浏览器的标准功能就是会提取它并显示在菜单里,所以这样更方便。我们在测试时经常会通过title来判断当前页面是否我们想要的。
Window和Tab相关
得到Window句柄(handle)
WebDriver并不区分窗口和Tab。如果我们打开一个新的window或者tab,那么我们就有多于一个页面。我们要在它们之间切换就要得到它的handle。下面的代码可以获得当前页面的handle:
driver.getWindowHandle();
切换页面
点击一个链接有可能会打开一个新的页面,浏览器会把焦点切换到新的页面上。但是Driver并不知道,所以我们需要告诉它,否则后续的控制命令就会出错。我们需要遍历所有的页面,然后找到新的页面。如果只有两个页面的话,我们首先记住当前的页面,然后遍历的过程中只要找到一个和当前页面句柄不同的就可以认为是新的页面。如果有多个页面,我们需要在程序里记录每一个句柄对应的是哪个页面。
//保存当前句柄
String originalWindow = driver.getWindowHandle();

//当前应该只有一个页面
assert driver.getWindowHandles().size() == 1;

//点击链接打开新的页面
driver.findElement(By.linkText("new window")).click();

//等待页面数变成2,也就是等待第二个页面打开
wait.until(numberOfWindowsToBe(2));

//遍历寻找新的句柄,找到后切换过去
for (String windowHandle : driver.getWindowHandles()) {
    if(!originalWindow.contentEquals(windowHandle)) {
        driver.switchTo().window(windowHandle);
        break;
    }
}

//等待页面加载
wait.until(titleIs("Selenium documentation"));
自己打开新的页面
除了点击链接打开一个新的页面,我们也可以自己控制浏览器打开一个新的页面,这样就可以实现控制浏览器同时访问多个页面(这在人来说是使用浏览器的常见手动,当然这会给程序的控制带来困难,我们需要知道哪个页面对应哪个网页)。注意:这个API在4.X的WebDriver才能使用。
// 打开一个新的tab
driver.switchTo().newWindow(WindowType.TAB);

// 打开一个新的window
driver.switchTo().newWindow(WindowType.WINDOW);
关闭当前页面
我们可以用close()关闭当前页面。但是需要注意的是关闭后我们需要切换到其它的页面,否则控制命令就会出错。
//关闭当前页面
driver.close();

//切换到之前的某个页面,我们需要知道其句柄
driver.switchTo().window(originalWindow);
退出浏览器
我们的任务完成后就需要关闭浏览器,否则我们的程序退出后浏览器还在那占着资源:
driver.quit();
为了避免程序异常而没有退出浏览器,我们通常会把上面的代码放到finally执行。
try {
    //WebDriver code here...
} finally {
    driver.quit();
}
如果是Python的话,可以用WebDriver是实现了context manager的,所以可以用with,保证它会自动退出:
with webdriver.Firefox() as driver:
  # WebDriver code here...

# 到这里的话浏览器应该关闭了
Frame和Iframe
Frame目前已经过期了,但是Iframe还是可以用来在一个网页里嵌套另一个网页。比如下面的示例HTML代码:
<div id="modal">
  <iframe id="buttonframe" name="myframe"  src="https://seleniumhq.github.io">
   <button>Click here</button>
 </iframe>
</div>
如果我们模拟浏览器点击Iframe下面的button,可能会这样:
driver.findElement(By.tagName("button")).click();
也就是找button按钮然后点击,关于WebElement的定位,后面会介绍。这里关注的是WebDriver只会在当前页面找button,而iframe里的会被认为是一个独立的东西,所以上面的代码会失败。
正确的做法是先切换到Iframe里再执行,下面介绍切换Iframe的几种方法。
定位Iframe的WebElement
对于当前网页来说,Iframe也是其Body下的一个子节点(WebElement),我们可以用各种定位方法来找到它,然后用switchTo.frame()进行切换:
//使用CSS定位Iframe
WebElement iframe = driver.findElement(By.cssSelector("#modal>iframe"));

//切换
driver.switchTo().frame(iframe);

//现在可以了
driver.findElement(By.tagName("button")).click();
使用名字和ID
如果Iframe有名字(name)或者id,那么通过名字和ID切换会更加简单:
//使用ID
driver.switchTo().frame("buttonframe");

//也可以使用名字
driver.switchTo().frame("myframe");

driver.findElement(By.tagName("button")).click();
使用Index
我们也可以使用frame的下标进行切换:
// 切换到第二个frame/iframe
driver.switchTo().frame(1);
和常见的编程习惯一样,下标是从零开始的,所以frame(1)表示第二个frame/iframe。
离开frame/iframe
对iframe进行操作完成后我们需要回到原来的”主”页面:
driver.switchTo().defaultContent();
窗口管理
得到窗口大小
//单独得到宽度和高度
int width = driver.manage().window().getSize().getWidth();
int height = driver.manage().window().getSize().getHeight();

//得到大小的Dimension对象
Dimension size = driver.manage().window().getSize();
int width1 = size.getWidth();
int height1 = size.getHeight();
设置窗口大小
driver.manage().window().setSize(new Dimension(1024, 768));
得到窗口的位置
// 单独的坐标
int x = driver.manage().window().getPosition().getX();
int y = driver.manage().window().getPosition().getY();

// 也可以先得到Point
Point position = driver.manage().window().getPosition();
int x1 = position.getX();
int y1 = position.getY();
注意:这里得到的是窗口左上角(Top-Left)的位置。
设置窗口的位置
比如把浏览器窗口移到屏幕的最左上方:
driver.manage().window().setPosition(new Point(0, 0));
最大化
driver.manage().window().maximize();
最小化
driver.manage().window().minimize();
全屏
driver.manage().window().fullscreen();
屏幕快照(截屏)
import org.apache.commons.io.FileUtils;
import org.openqa.selenium.chrome.ChromeDriver;
import java.io.*;
import org.openqa.selenium.*;

public class SeleniumTakeScreenshot {
    public static void main(String args[]) throws IOException {
        WebDriver driver = new ChromeDriver();
        driver.get("http://www.example.com");
        File scrFile = ((TakesScreenshot)driver).getScreenshotAs(OutputType.FILE);
        FileUtils.copyFile(scrFile, new File("./image.png"));
        driver.quit();
    }
}
某个元素的快照
比如在后面,我们希望对二维码的图片进行快照。代码示例如下:
import org.apache.commons.io.FileUtils;
import org.openqa.selenium.*;
import org.openqa.selenium.chrome.ChromeDriver;
import java.io.File;
import java.io.IOException;

public class SeleniumelementTakeScreenshot {
  public static void main(String args[]) throws IOException {
    WebDriver driver = new ChromeDriver();
    driver.get("https://www.example.com");
    WebElement element = driver.findElement(By.cssSelector("h1"));
    File scrFile = element.getScreenshotAs(OutputType.FILE);
    FileUtils.copyFile(scrFile, new File("./image.png"));
    driver.quit();
  }
}
执行JS
官方文档说不支持,但是上网搜了一下,好像是可以的:
WebDriver driver = new ChromeDriver();
System.setProperty("webdriver.chrome.driver", "/home/lili/soft/chromedriver");

JavascriptExecutor js = (JavascriptExecutor)driver;
js.executeScript("window.location = 'http://demo.guru99.com/'");
关于JS的执行可以参考这篇文章。
等待
WebDriver本质上是一个同步的API,因为它和浏览器不是同一个进程,而浏览器本质上一个异步的工作方式,所以会出现同步的问题。比如下面的HTML页面:
<!doctype html>
<meta charset=utf-8>
<title>Race Condition Example</title>

<script>
  var initialised = false;
  window.addEventListener("load", function() {
    var newElement = document.createElement("p");
    newElement.textContent = "Hello from JavaScript!";
    document.body.appendChild(newElement);
    initialised = true;
  });
</script>
在页面加载完成之后用JS创建一个<P>的元素。如果我们用WebDriver打开页面后马上查找它,就可能出现问题:
driver.get("file:///race_condition.html");
WebElement element = driver.findElement(By.tagName("p"));
assertEquals(element.getText(), "Hello from JavaScript!");
因为driver.get()会默认在页面加载”完成”之后返回,但是JS的执行是在这之后,这就很有可能(但只是有可能,并发的顺序是不可预测的)出现driver.findElement时找不到它。另外在很多页面,我们需要触发某个动作(比如下拉)让浏览器进行异步刷新,这个时候如果动作之后马上查找数据,可能也无法得到最新的数据,因为它们还在下载和加载过程中。所以我们需要等待!
显式等待
显式等待是Selenium客户可以使用的命令式过程语言。它们允许您的代码暂停程序执行,或冻结线程,直到满足条件。这个条件会以一定的频率一直被调用,直到等待超时。这意味着只要条件返回一个假值,它就会一直尝试和等待。由于显式等待允许您等待条件的发生,所以它们非常适合在浏览器及其DOM和WebDriver脚本之间同步状态。为了弥补我们之前的错误指令集,我们可以使用等待来让findElement调用等待直到脚本中动态添加的元素被添加到DOM中:
WebDriver driver = new ChromeDriver();
driver.get("https://google.com/ncr");
driver.findElement(By.name("q")).sendKeys("cheese" + Keys.ENTER);
// 等待H3可以被点击,超时时间为10秒。
WebElement firstResult = new WebDriverWait(driver, Duration.ofSeconds(10))
        .until(ExpectedConditions.elementToBeClickable(By.xpath("//a/h3")));
// Print the first result
System.out.println(firstResult.getText());
上面的代码构造WebDriverWait对象,传入的参数是WebDriver和超时时间。接着对这个WebDriverWait对象调用until方法,传入的参数是elementToBeClickable。
我们先看until函数,它接受的参数是一个函数,下面是它的代码:
 @Override
  public <V> V until(Function<? super T, V> isTrue) {
    Instant end = clock.instant().plus(timeout);

    Throwable lastException;
    while (true) {
      try {
        V value = isTrue.apply(input);
        if (value != null && (Boolean.class != value.getClass() || Boolean.TRUE.equals(value))) {
          return value;
        }

        // Clear the last exception; if another retry or timeout exception would
        // be caused by a false or null value, the last exception is not the
        // cause of the timeout.
        lastException = null;
      } catch (Throwable e) {
        lastException = propagateIfNotIgnored(e);
      }

      // Check the timeout after evaluating the function to ensure conditions
      // with a zero timeout can succeed.
      if (end.isBefore(clock.instant())) {
        String message = messageSupplier != null ?
                         messageSupplier.get() : null;

        String timeoutMessage = String.format(
            "Expected condition failed: %s (tried for %d second(s) with %d milliseconds interval)",
            message == null ? "waiting for " + isTrue : message,
            timeout.getSeconds(), interval.toMillis());
        throw timeoutException(timeoutMessage, lastException);
      }

      try {
        sleeper.sleep(interval);
      } catch (InterruptedException e) {
        Thread.currentThread().interrupt();
        throw new WebDriverException(e);
      }
    }
  }
代码其实非常简单,就是不断检测条件是否满足。条件判断就是调用传入Function的apply方法的返回值,如果返回值不是Boolean类型,则非空就是True,否则就要看Boolean值是否True。如果满足条件则返回,否则sleep一段时间后再重试。如果超过时间,则会抛出timeoutException。那怎么实现一个函数呢?当然可以写一个类继承Function<WebDriver, Boolean>,但是最简单的还是使用lambda。比如我们如下的代码:
WebElement foo = new WebDriverWait(driver, Duration.ofSeconds(3))
          .until(driver -> driver.findElement(By.name("q")));
assertEquals(foo.getText(), "Hello from JavaScript!");
我们传入的是lambda:
driver -> driver.findElement(By.name("q"))
这个函数或者lambda的输入是WebDriver,输出是一个Boolean值。对于常见的判断条件,WebDriver的client已经帮我们封装好了,比如前面用findElement来确定某个元素是否存在可以用presenceOfElementLocated:
  public static ExpectedCondition<WebElement> presenceOfElementLocated(final By locator) {
    return new ExpectedCondition<WebElement>() {
      @Override
      public WebElement apply(WebDriver driver) {
        return driver.findElement(locator);
      }

      @Override
      public String toString() {
        return "presence of element located by: " + locator;
      }
    };
  }
toString只是为了调试方便,核心实现的就是apply方法,其实就是driver.findElement()。喜欢探究根底的读者可能会问,怎么不是继承Function<WebDriver, Boolean>?为什么返回的是ExpectedCondition
public interface ExpectedCondition<T> extends Function<WebDriver, T> {}
这里传入的泛型T是WebElement。注意:ExpectedCondition继承的不是java.util.function.Function,而是com.google.common.base.Function:
@FunctionalInterface
@GwtCompatible
public interface Function<F, T> extends java.util.function.Function<F, T> {
    @NullableDecl
    @CanIgnoreReturnValue
    T apply(@NullableDecl F var1);

    boolean equals(@NullableDecl Object var1);
}
基本上就是在java.util.function.Function上加了两个注解。
除了presenceOfElementLocated,另外一个常用的就是visibilityOfElementLocated和elementToBeClickable。先看visibilityOfElementLocated:
  public static ExpectedCondition<WebElement> visibilityOfElementLocated(final By locator) {
    return new ExpectedCondition<WebElement>() {
      @Override
      public WebElement apply(WebDriver driver) {
        try {
          return elementIfVisible(driver.findElement(locator));
        } catch (StaleElementReferenceException e) {
          return null;
        }
      }

      @Override
      public String toString() {
        return "visibility of element located by " + locator;
      }
    };
  }
它会调用elementIfVisible来检查WebElement是否可见,如果不可见返回null,这个函数非常简单:
private static WebElement elementIfVisible(WebElement element) {
return element.isDisplayed() ? element : null;
}
接着是elementToBeClickable:
  public static ExpectedCondition<WebElement> elementToBeClickable(final By locator) {
    return new ExpectedCondition<WebElement>() {
      @Override
      public WebElement apply(WebDriver driver) {
        WebElement element = visibilityOfElementLocated(locator).apply(driver);
        try {
          if (element != null && element.isEnabled()) {
            return element;
          }
          return null;
        } catch (StaleElementReferenceException e) {
          return null;
        }
      }

      @Override
      public String toString() {
        return "element to be clickable: " + locator;
      }
    };
  }
它只是在visibilityOf的基础上判断WebElement是否enable:element.isEnabled()。
内置条件
不同语言的客户端实现了不同的内置条件,常见的条件包括:
- alert是否出现
- 某个element是否存在
- 某个element是否可见
- title包含某些字符串
- title等于某个特定值
- element的staleness
- 文本可见
更多Java客户端的条件参考doc。
隐式等待
另外一种等待方式就是隐式等待,默认它是关闭的,需要我们手动打开。注意:不要同时使用隐式等待和显示等待,如果我们设置显式等待15s和隐式等待10s,那么最终的等待时间可能是20s。隐式等待只需要设置一次,后面持续有效。
WebDriver driver = new FirefoxDriver();
driver.manage().timeouts().implicitlyWait(10, TimeUnit.SECONDS);
driver.get("http://somedomain/url_that_delays_loading");
WebElement myDynamicElement = driver.findElement(By.id("myDynamicElement"));
FluentWait
前面的显示等待只能设置总的等待时间,但是不能设置重试的时间。如果重试的时间太短,浪费资源;重试时间太长,返回结果又较慢。FluentWait可以让我们同时设置总的时间和重试(poll)时间:
Wait<WebDriver> wait = new FluentWait<WebDriver>(driver)
  .withTimeout(Duration.ofSeconds(30))
  .pollingEvery(Duration.ofSeconds(5))
  .ignoring(NoSuchElementException.class);

WebElement foo = wait.until(new Function<WebDriver, WebElement>() {
  public WebElement apply(WebDriver driver) {
    return driver.findElement(By.id("foo"));
  }
});
处理JavaScript的alert、prompt和confirm
虽然目前很少会碰到,但是有些网站还是会用alert、prompt和confirmation函数弹出对话框来给我们警告、让我们输入或者让我们确认/取消。这些函数是模态(modal)对话框,如果不处理,网页就会卡在那里。所以我们也需要浏览器模拟人来处理它们。
alert
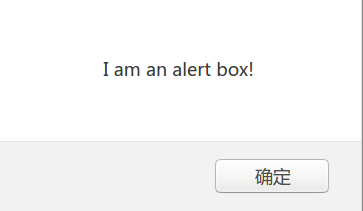
alert函数给用户一个警告的文本信息,用户除了接受之外别无选择。用JavaScript实现alert很简单:
window.alert("I am an alert box!");
结果如图:
处理alert对话框的代码如下:
//假设点击某个按钮会执行JS产生alert对话框
driver.findElement(By.linkText("See an example alert")).click();

//等待alert对话框出现
Alert alert = wait.until(ExpectedConditions.alertIsPresent());

//可以拿到alert的文本
String text = alert.getText();

//点击OK按钮
alert.accept();
confirm
confirm和alert类似,但是用户有确定和取消两种选择。用JavaScript实现的代码为:
if (confirm("Press a button!")) {
  txt = "You pressed OK!";
} else {
  txt = "You pressed Cancel!";
}
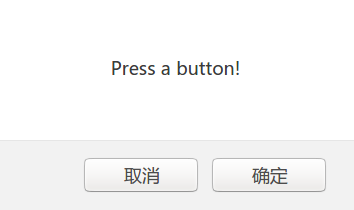 confirm对话框
处理的代码为:
//假设点击某个链接会出现confirm对话框
driver.findElement(By.linkText("See a sample confirm")).click();

//等待出现
wait.until(ExpectedConditions.alertIsPresent());

//换一种方法,使用switchTo()
Alert alert = driver.switchTo().alert();

//得到confirm的提示文本
String text = alert.getText();

//取消,如果同意可以调用accept()
alert.dismiss();
confirm的处理和alert类似,唯一的区别就是alert只能accept,而confirm还可以dismiss。注意:alert我们使用的是ExpectedConditions.alertIsPresent()返回的Alert对象;这里使用的是driver.switchTo().alert()。它们的结果是一样的,都是拿到当前的Alert对象。
prompt
prompt对话框除了一个提示文本外还可以接受用户的输入,JavaScript代码如下:
var person = prompt("Please enter your name", "Harry Potter");

if (person == null || person == "") {
  txt = "User cancelled the prompt.";
} else {
  txt = "Hello " + person + "! How are you today?";
}
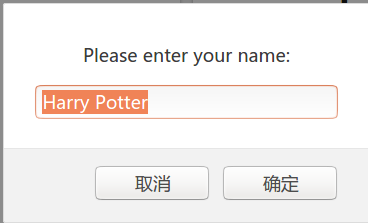 prompt对话框
我们可以在prompt对话框里输入文字然后确认(当然也可以直接dismiss):
//假设点击后会出现prompt对话框
driver.findElement(By.linkText("See a sample prompt")).click();

//等待
Alert alert = wait.until(ExpectedConditions.alertIsPresent());

//输入文字
alert.sendKeys("Selenium");

//确认按钮
alert.accept();
设置HTTP代理
import org.openqa.selenium.Proxy;
import org.openqa.selenium.WebDriver;
import org.openqa.selenium.chrome.ChromeDriver;
import org.openqa.selenium.chrome.ChromeOptions;

public class proxyTest {
  public static void main(String[] args) {
    Proxy proxy = new Proxy();
    proxy.setHttpProxy("<HOST:PORT>");
    ChromeOptions options = new ChromeOptions();
    options.setCapability("proxy", proxy);
    WebDriver driver = new ChromeDriver(options);
    driver.get("https://www.google.com/");
    driver.manage().window().maximize();
    driver.quit();
  }
}
注意:不同的浏览器设置代理的方法是不一样的,这里是设置Chrome浏览器的HTTP代理的方法。但是如果我们想设置其它代理比如socks代理怎么办呢?我们知道用命令行启动Chrome是可以加入–proxy-server选项来制定代理,包括socks代理,比如
google-chrome --proxy-server=socks5://host:port
因此我们也可以在启动WebDriver前使用这个选项来制定代理(包括非HTTP代理):
ChromeOptions options = new ChromeOptions();
options.addArguments("--proxy-server=socks5://" + host + ":" + port);
WebDriver driver = new ChromeDriver(options);
页面加载策略
我们可以定义当前页面加载策略。 默认情况下, 当Selenium WebDriver加载页面时, 使用normal策略。
document.readyState属性描述当前页面的加载状态。默认情况下,在页面readyState是complete之前,WebDriver的driver.get()和driver.navigate().to()都会一直等待直到超时或者状态变成complete。
在单页应用程序(Single Page Application, SPA)中(例如Angular、React和Ember),动态内容加载完毕后即pageLoadStrategy状态为COMPLETE)。如果点击链接或在页面内执行某些操作的行为将不会向服务器发出新请求, 因为内容在客户端动态加载, 无需刷新整个页面。
单页应用程序可以动态加载许多视图, 而无需任何服务器请求, 因此页面加载策略将始终显示为COMPLETE的状态。除非我们执行新的driver.get()或driver.navigate().to()才会重新刷新页面从而改变状态。
normal策略
这个策略会让WebDriver等待整个页面加载完成(不包括onLoad之后的JS代码和异步刷新代码)。WebDriver会通过load事件的发生来判断是否加载完成。默认的策略就是normal策略,当然我们手动设置一下也没有问题:
import org.openqa.selenium.PageLoadStrategy;
import org.openqa.selenium.WebDriver;
import org.openqa.selenium.chrome.ChromeOptions;
import org.openqa.selenium.chrome.ChromeDriver;

public class pageLoadStrategy {
    public static void main(String[] args) {
        ChromeOptions chromeOptions = new ChromeOptions();
        chromeOptions.setPageLoadStrategy(PageLoadStrategy.NORMAL);
        WebDriver driver = new ChromeDriver(chromeOptions);
        try {
            // Navigate to Url
            driver.get("https://google.com");
        } finally {
            driver.quit();
        }
    }
}
eager模式
这种模式下,WebDriver会等待初始化的HTML文档加载完成,但是它不会等待样式、图片和Iframe等内容的parse和加载。因此这种模式下get()返回后图片和样式都可能没有加载完成。具体来讲,WebDriver会用DOMContentLoaded事件的发生来判断是否从get()返回。
设置eager策略代码如下:
import org.openqa.selenium.PageLoadStrategy;
import org.openqa.selenium.WebDriver;
import org.openqa.selenium.chrome.ChromeOptions;
import org.openqa.selenium.chrome.ChromeDriver;

public class pageLoadStrategy {
    public static void main(String[] args) {
        ChromeOptions chromeOptions = new ChromeOptions();
        chromeOptions.setPageLoadStrategy(PageLoadStrategy.EAGER);
        WebDriver driver = new ChromeDriver(chromeOptions);
        try {
            // Navigate to Url
            driver.get("https://google.com");
        } finally {
            driver.quit();
        }
    }
}
none策略
none策略更加激进,只要主页面下载完成(还没有parse)就返回,实际中很少会用到none策略。它的设置代码为:
import org.openqa.selenium.PageLoadStrategy;
import org.openqa.selenium.WebDriver;
import org.openqa.selenium.chrome.ChromeOptions;
import org.openqa.selenium.chrome.ChromeDriver;

public class pageLoadStrategy {
    public static void main(String[] args) {
        ChromeOptions chromeOptions = new ChromeOptions();
        chromeOptions.setPageLoadStrategy(PageLoadStrategy.NONE);
        WebDriver driver = new ChromeDriver(chromeOptions);
        try {
            // Navigate to Url
            driver.get("https://google.com");
        } finally {
            driver.quit();
        }
    }
}
WebElement
对于浏览器自动化来说,最重要和关键的点就是定位(找到)某个/某些HTML元素,然后获取其中的信息或者与它进行交互(点击、输入、拖动等等)。具体怎么查找和定位,后面会主要介绍XPATH。这里先介绍HTML元素本身,在WebDriver对应的就是WebElement。这里需要区分两个概念:Element和Node。详细的区别参考这里,简单来说,HTML被parse后就是一棵树,Element就是HTML标签对应的节点。而其它节点如文本节点、评论节点和属性节点都不属于Element。注意:一个Element的一个属性也可以看成这个Element的孩子,但是一般会特别对待。
比如下面这段简单的HTML:
<html>
<body>
<h1>header</h1>
<div id='mydiv'>a div that has a <span>span</span> in it.<!-- comment--></div>
</html>
div是一个Element,它有一个属性id,值为mydiv。另外它有4个孩子:一个text node “a div that has “;一个span,这也是一个element;还有一个text node “in it.”;一个comment node。而span没有属性,但是它有一个孩子text node “span”。
findElement
WebDriver driver = new FirefoxDriver();

driver.get("http://www.google.com");

// 查找名字为q的Element
WebElement searchBox = driver.findElement(By.name("q"));

searchBox.sendKeys("webdriver");
FindElement会查找一个元素,如果查找的元素多于一个,则它会返回第一个。如果需要查找多个元素,请使用下面的findElements。
findElement的参数是一个By对象,也就是查找的方式。看代码可以发现有如下几种:
    public static By id(String id) {
        return new By.ById(id);
    }

    public static By linkText(String linkText) {
        return new By.ByLinkText(linkText);
    }

    public static By partialLinkText(String partialLinkText) {
        return new By.ByPartialLinkText(partialLinkText);
    }

    public static By name(String name) {
        return new By.ByName(name);
    }

    public static By tagName(String tagName) {
        return new By.ByTagName(tagName);
    }

    public static By xpath(String xpathExpression) {
        return new By.ByXPath(xpathExpression);
    }

    public static By className(String className) {
        return new By.ByClassName(className);
    }

    public static By cssSelector(String cssSelector) {
        return new By.ByCssSelector(cssSelector);
    }
总结起来就是:
- By.id
- 通过HTML元素的ID查找,通常(如果网页写的不是太烂)是唯一的。
- By.linkText
- 查找一个链接(A元素),查找的方式是链接的文字完全匹配
- By.partialLinkText
- 链接文字部分匹配
- By.name
- 通过元素的名字数学(name)查找
- By.tagName
- 通过元素的Tag名字,比如找H1
- By.xpath
- 最为强大(也最为复杂)的方法,后面会介绍
- By.className
- 通过一个元素的class属性(CSS样式通常会用它选择元素),比如<p class='bg_color'>
- By.cssSelector
- 除了xpath之外第二强大和复杂的语法,前端工程师可能熟悉和喜欢它
这里最强大(复杂)的方法是By.xpath和By.cssSelector,我更习惯使用xpath,所以后面会介绍xpath,对cssSeletor感兴趣的读者可以参考CSS Selectors。
findElements
查找多个元素使用findElements,它返回的是List
import org.openqa.selenium.By;
import org.openqa.selenium.WebDriver;
import org.openqa.selenium.WebElement;
import org.openqa.selenium.firefox.FirefoxDriver;
import java.util.List;

public class findElementsExample {
    public static void main(String[] args) {
        WebDriver driver = new FirefoxDriver();
        try {
            driver.get("https://example.com");
            // Get all the elements available with tag name 'p'
            List<WebElement> elements = driver.findElements(By.tagName("p"));
            for (WebElement element : elements) {
                System.out.println("Paragraph text:" + element.getText());
            }
        } finally {
            driver.quit();
        }
    }
}
从某个元素的孩子(子树)里查找
前面的查找可以认为是从整个HTML树下进行查找,为了缩小范围和提高速度,我们可以从某个元素的子树里查找(当然我们得提前先找到这个元素)。这时我们调用WebElement.findElement(s)就可以了(而不是WebDriver.findElement(s))。代码示例:
WebDriver driver = new FirefoxDriver();
driver.get("http://www.google.com");
// 先找到form
WebElement searchForm = driver.findElement(By.tagName("form"));
// 在form下面找q
WebElement searchBox = searchForm.findElement(By.name("q"));
searchBox.sendKeys("webdriver");
得到当前活跃的元素
有的时候JavaScript会改变当前的焦点(活跃元素),我们希望知道它。可以使用driver.switchTo().activeElement():
  import org.openqa.selenium.*;
  import org.openqa.selenium.chrome.ChromeDriver;

  public class activeElementTest {
    public static void main(String[] args) {
      WebDriver driver = new ChromeDriver();
      try {
        driver.get("http://www.google.com");
        driver.findElement(By.cssSelector("[name='q']")).sendKeys("webElement");

        // Get attribute of current active element
        String attr = driver.switchTo().activeElement().getAttribute("title");
        System.out.println(attr);
      } finally {
        driver.quit();
      }
    }
  }
判断某个元素是否Enable
  //访问某个页面
  driver.get("https://www.google.com/");

  //判断某个元素是否可以Enable(可以点击)
  boolean value = driver.findElement(By.name("btnK")).isEnabled();
判断某个元素是否被选中
可以使用WebElement.isSelected():
 driver.get("https://the-internet.herokuapp.com/checkboxes");
 boolean value = driver.findElement(By.cssSelector("input[type='checkbox']:first-of-type")).isSelected();
得到某个元素的Tag
 driver.get("https://www.example.com");

 String value = driver.findElement(By.cssSelector("h1")).getTagName();
得到某个元素被渲染后的位置和大小
driver.get("https://www.example.com");

Rectangle res =  driver.findElement(By.cssSelector("h1")).getRect();

// Rectangle类提供getX,getY, getWidth, getHeight四个方法
System.out.println(res.getX());
得到某个元素的样式
我们也可以得到一个元素的样式,注意,这里得到的是计算后的样式,即使HTML没有设置,也会有继承来的默认值。
driver.get("https://www.example.com");

String cssValue = driver.findElement(By.linkText("More information...")).getCssValue("color");
得到元素的文本
WebElement.getText()函数,注意:它会递归的展开所以孩子节点,比如下面的HTML:
<html>
<body>
<h1>header</h1>
<div>a div that has a <span>span</span> in it.</div>
</html>
用div对应的WebElement.getText()返回的是”a div that has a span in it.”
键盘操作
输入文本
我们可以对一个WebElement调用sendKeys来向它输入文本(当然这个WebElement得能输入文本,我们不能向一个按钮输入文本):
import org.openqa.selenium.By;
import org.openqa.selenium.Keys;
import org.openqa.selenium.WebDriver;
import org.openqa.selenium.firefox.FirefoxDriver;

public class HelloSelenium {
  public static void main(String[] args) {
    WebDriver driver = new FirefoxDriver();
    try {
      // Navigate to Url
      driver.get("https://google.com");

      // Enter text "q" and perform keyboard action "Enter"
      driver.findElement(By.name("q")).sendKeys("q" + Keys.ENTER);
    } finally {
      driver.quit();
    }
  }
}
模拟CTRL、SHIFT和ALT按下
可以使用keyDown方法:
WebDriver driver = new ChromeDriver();
try {
  // Navigate to Url
  driver.get("https://google.com");

  // Enter "webdriver" text and perform "ENTER" keyboard action
  driver.findElement(By.name("q")).sendKeys("webdriver" + Keys.ENTER);

  Actions actionProvider = new Actions(driver);
  Action keydown = actionProvider.keyDown(Keys.CONTROL).sendKeys("a").build();
  keydown.perform();
} finally {
  driver.quit();
}
上面的代码实现输入CTRL+a。这里使用的是Actions和Action,它是不考虑当前元素是什么的,因此我们一定要”激活”对应的元素。比如sendKeys就会先激活这个元素。
松开CTRL、SHIFT和ALT
前面我们的Actions包含了按下CTRL,如果我们想”取消”按下操作,就可以使用keyUp方法:
import org.openqa.selenium.By;
import org.openqa.selenium.Keys;
import org.openqa.selenium.WebDriver;
import org.openqa.selenium.WebElement;
import org.openqa.selenium.firefox.FirefoxDriver;
import org.openqa.selenium.interactions.Actions;

public class HelloSelenium {
  public static void main(String[] args) {
    WebDriver driver = new FirefoxDriver();
    try {
      // Navigate to Url
      driver.get("https://google.com");
      Actions action = new Actions(driver);

      // Store google search box WebElement
      WebElement search = driver.findElement(By.name("q"));

      // 按住SHIFT再按"qwerty",接着松开SHIFT在输入qwerty,所以最终的输入是(QWERTYqwerty)
      action.keyDown(Keys.SHIFT).sendKeys(search,"qwerty").keyUp(Keys.SHIFT).sendKeys("qwerty").perform();
    } finally {
      driver.quit();
    }
  }
}
清除文本
使用WebElement.clear():
import org.openqa.selenium.By;
import org.openqa.selenium.WebDriver;
import org.openqa.selenium.WebElement;
import org.openqa.selenium.chrome.ChromeDriver;

public class clear {
  public static void main(String[] args) {
    WebDriver driver = new ChromeDriver();
    try {
      // Navigate to Url
      driver.get("https://www.google.com");
      // Store 'SearchInput' element
      WebElement searchInput = driver.findElement(By.name("q"));
      searchInput.sendKeys("selenium");
      // Clears the entered text
      searchInput.clear();
    } finally {
      driver.quit();
    }
  }
}
其它功能
颜色
在进行测试(尤其是UI)时有的时候要判断某个元素的颜色是否符合预期,比如点击链接后的颜色。为了支持颜色,我们可以导入:
import org.openqa.selenium.support.Color;
我们可以用各种静态方法来构造颜色:
private final Color HEX_COLOUR = Color.fromString("#2F7ED8");
private final Color RGB_COLOUR = Color.fromString("rgb(255, 255, 255)");
private final Color RGB_COLOUR = Color.fromString("rgb(40%, 20%, 40%)");
private final Color RGBA_COLOUR = Color.fromString("rgba(255, 255, 255, 0.5)");
private final Color RGBA_COLOUR = Color.fromString("rgba(40%, 20%, 40%, 0.5)");
private final Color HSL_COLOUR = Color.fromString("hsl(100, 0%, 50%)");
private final Color HSLA_COLOUR = Color.fromString("hsla(100, 0%, 50%, 0.5)");
除了上面的方法,Color类也支持w3c css color字符串:
private final Color BLACK = Color.fromString("black");
private final Color CHOCOLATE = Color.fromString("chocolate");
private final Color HOTPINK = Color.fromString("hotpink");
如果某个元素的颜色没有设置,浏览器有时也会返回一个透明(transparent)的颜色,我们也可以构造:
private final Color TRANSPARENT = Color.fromString("transparent");
接下来我们可以得到一个WebElement的前景色或者背景色:
Color loginButtonColour = Color.fromString(driver.findElement(By.id("login")).getCssValue("color"));

Color loginButtonBackgroundColour = Color.fromString(driver.findElement(By.id("login")).getCssValue("background-color"));
然后和预期的颜色进行比较:
assert loginButtonBackgroundColour.equals(HOTPINK);
当然也可以把它转换成字符串后进行比较:
assert loginButtonBackgroundColour.asHex().equals("#ff69b4");
assert loginButtonBackgroundColour.asRgba().equals("rgba(255, 105, 180, 1)");
assert loginButtonBackgroundColour.asRgb().equals("rgb(255, 105, 180)");
Select元素
HTML使用Select标签来实现下拉菜单,因为它的除了比较繁琐,因此WebDriver的Java客户端封装了一个Select类来让我们的生活更加简单。首先我们需要import它:
import org.openqa.selenium.support.ui.Select;
我们首先用findElement找到Select元素,然后用Select对象封装它:
WebElement selectElement = driver.findElement(By.id("selectElementID"));
Select selectObject = new Select(selectElement);
为了讨论方便,我们假设这个Select的代码为:
<select>
 <option value=value1>Bread</option>
 <option value=value2 selected>Milk</option>
 <option value=value3>Cheese</option>
</select>
假设我们想让浏览器选中某个特定的option,有如下的方法:
// 通过index,注意这里的下标从1开始!
selectObject.selectByIndex(1);

// 通过value属性,这是form提交时传给服务器的值。
selectObject.selectByValue("value1");

// 通过用户看到的文本
selectObject.selectByVisibleText("Bread");
如果我们想得到被选中的option(注意:如果multiple属性被设置,则可以多选),可以:
// 返回使用被选中的option
List<WebElement> allSelectedOptions = selectObject.getAllSelectedOptions();

// 返回第一个被选中的
WebElement firstSelectedOption = selectObject.getFirstSelectedOption();
我们也可以拿到这个Select下的所有Option:
List<WebElement> allAvailableOptions = selectObject.getOptions();
如果我们想取消选中第一个Option,有如下方法:
// 通过下标,下标从1开始!
selectObject.deselectByIndex(1);

// 通过value属性
selectObject.deselectByValue("value1");

// 通过用户可见的文本
selectObject.deselectByVisibleText("Bread");

// 全部取消选中
selectObject.deselectAll();
我们也可以通过isMultiple()函数判断这个Select是否可以多选:
Boolean doesThisAllowMultipleSelections = selectObject.isMultiple();
鼠标操作
clickAndHold
这个操作表示用鼠标点击某个元素并且不放松。
import org.openqa.selenium.By;
import org.openqa.selenium.WebDriver;
import org.openqa.selenium.WebElement;
import org.openqa.selenium.chrome.ChromeDriver;
import org.openqa.selenium.interactions.Actions;

public class clickAndHold {
  public static void main(String[] args) {
    WebDriver driver = new ChromeDriver();
    try {
      // Navigate to Url
      driver.get("https://google.com");

      // Store 'google search' button web element
      WebElement searchBtn = driver.findElement(By.linkText("Sign in"));
      Actions actionProvider = new Actions(driver);
      // Perform click-and-hold action on the element
      actionProvider.clickAndHold(searchBtn).build().perform();
    } finally {
      driver.quit();
    }
  }
}
contextClick
右键点击某个元素,唤出上下文菜单。
import org.openqa.selenium.By;
import org.openqa.selenium.WebDriver;
import org.openqa.selenium.WebElement;
import org.openqa.selenium.chrome.ChromeDriver;
import org.openqa.selenium.interactions.Actions;

public class contextClick {
  public static void main(String[] args) {
    WebDriver driver = new ChromeDriver();
    try {
      // Navigate to Url
      driver.get("https://google.com");

      // Store 'google search' button web element
      WebElement searchBtn = driver.findElement(By.linkText("Sign in"));
      Actions actionProvider = new Actions(driver);
      // Perform context-click action on the element
      actionProvider.contextClick(searchBtn).build().perform();
    } finally {
      driver.quit();
    }
  }
}
doubleClick
鼠标双击某个元素。
import org.openqa.selenium.By;
import org.openqa.selenium.WebDriver;
import org.openqa.selenium.WebElement;
import org.openqa.selenium.chrome.ChromeDriver;
import org.openqa.selenium.interactions.Actions;

public class doubleClick {
  public static void main(String[] args) {
    WebDriver driver = new ChromeDriver();
    try {
      // Navigate to Url
      driver.get("https://google.com");

      // Store 'google search' button web element
      WebElement searchBtn = driver.findElement(By.linkText("Sign in"));
      Actions actionProvider = new Actions(driver);
      // Perform double-click action on the element
      actionProvider.doubleClick(searchBtn).build().perform();
    } finally {
      driver.quit();
    }
  }
}
moveToElement
把鼠标移动到某个元素的中间,同时窗口也会滚到使得这个元素可见,类似于Chrome开发者工具Inspector里的”scroll to view”。
import org.openqa.selenium.By;
import org.openqa.selenium.WebDriver;
import org.openqa.selenium.WebElement;
import org.openqa.selenium.chrome.ChromeDriver;
import org.openqa.selenium.interactions.Actions;

public class moveToElement {
  public static void main(String[] args) {
    WebDriver driver = new ChromeDriver();
    try {
      // Navigate to Url
      driver.get("https://google.com");

      // Store 'Gmail' anchor web element
      WebElement gmailLink = driver.findElement(By.linkText("Gmail"));
      Actions actionProvider = new Actions(driver);
      // Performs mouse move action onto the element
      actionProvider.moveToElement(gmailLink).build().perform();
    } finally {
      driver.quit();
    }
  }
}
moveByOffset
移动鼠标。输入的参数是移动的位移(也就是相对当前位置的移动量)。
import org.openqa.selenium.By;
import org.openqa.selenium.WebDriver;
import org.openqa.selenium.WebElement;
import org.openqa.selenium.chrome.ChromeDriver;
import org.openqa.selenium.interactions.Actions;

public class moveByOffset {
  public static void main(String[] args) {
    WebDriver driver = new ChromeDriver();
    try {
      // Navigate to Url
      driver.get("https://google.com");

      // Store 'Gmail' anchor web element
      WebElement gmailLink = driver.findElement(By.linkText("Gmail"));
      // Capture x and y offset positions of element
      int xOffset = gmailLink.getRect().getX();
      int yOffset = gmailLink.getRect().getY();
      Actions actionProvider = new Actions(driver);
      // Performs mouse move action onto the offset position
      actionProvider.moveByOffset(xOffset, yOffset).build().perform();
    } finally {
      driver.quit();
    }
  }
}
dragAndDrop
把一个元素拖到另一个上面。
import org.openqa.selenium.By;
import org.openqa.selenium.WebDriver;
import org.openqa.selenium.WebElement;
import org.openqa.selenium.chrome.ChromeDriver;
import org.openqa.selenium.interactions.Actions;

public class dragAndDrop {
  public static void main(String[] args) {
    WebDriver driver = new ChromeDriver();
    try {
      // Navigate to Url
      driver.get("https://crossbrowsertesting.github.io/drag-and-drop");
      // Store 'box A' as source element
      WebElement sourceEle = driver.findElement(By.id("draggable"));
      // Store 'box B' as source element
      WebElement targetEle = driver.findElement(By.id("droppable"));
      Actions actionProvider = new Actions(driver);
      // Performs drag and drop action of sourceEle onto the targetEle
      actionProvider.dragAndDrop(sourceEle, targetEle).build().perform();
    } finally {
      driver.quit();
    }
  }
}
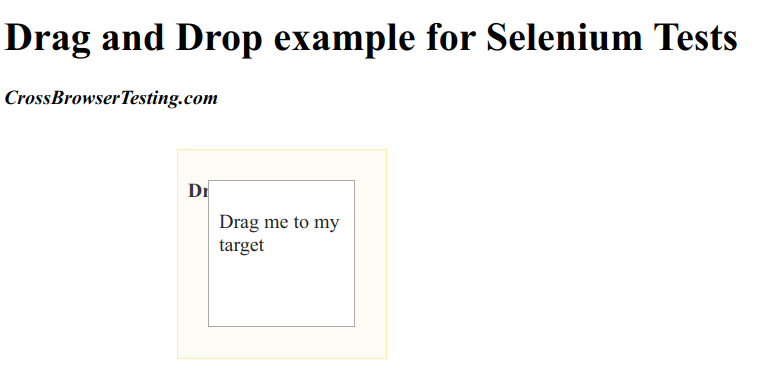
我们可以打开这个链接。里面有两个Element,A和B,如下图所示:
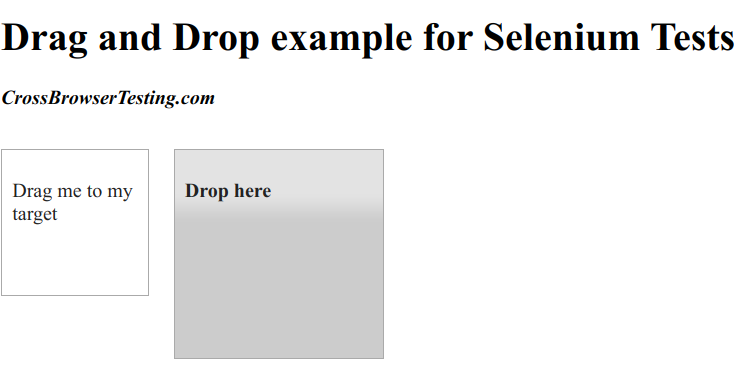 拖放前
拖放前
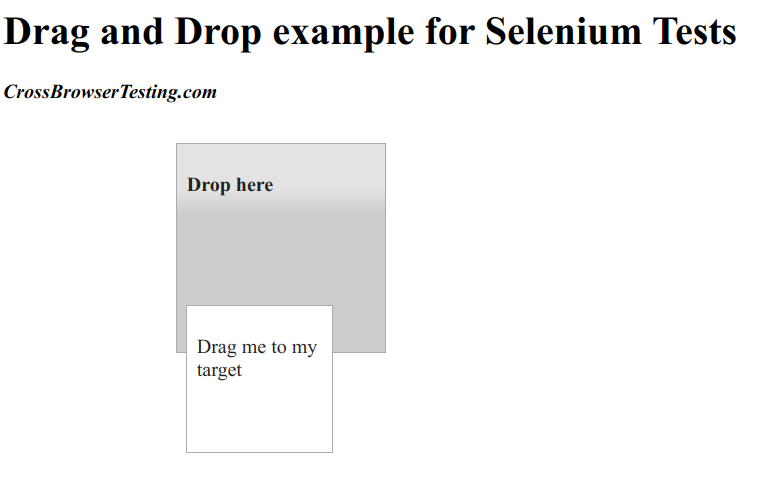
执行”actionProvider.dragAndDrop(sourceEle, targetEle).build().perform();”后:
 拖放后
拖放后
dragAndDropBy
前面的dragAndDrop会点击第一个元素,然后把它拖放到第二个元素正中间的位置。但是有时候我们想把它拖放到其它的位置,这个时候就可以用这个函数了:
import org.openqa.selenium.By;
import org.openqa.selenium.WebDriver;
import org.openqa.selenium.WebElement;
import org.openqa.selenium.chrome.ChromeDriver;
import org.openqa.selenium.interactions.Actions;

public class dragAndDropBy {
  public static void main(String[] args) {
    WebDriver driver = new ChromeDriver();
    try {
      // Navigate to Url
      driver.get("https://crossbrowsertesting.github.io/drag-and-drop");
      // Store 'box A' as source element
      WebElement sourceEle = driver.findElement(By.id("draggable"));
      // Store 'box B' as source element
      WebElement targetEle = driver.findElement(By.id("droppable"));
      int targetEleXOffset = targetEle.getLocation().getX();
      int targetEleYOffset = targetEle.getLocation().getY();
      Actions actionProvider = new Actions(driver);
      // Performs dragAndDropBy onto the  target element offset position
      actionProvider.dragAndDropBy(sourceEle, targetEleXOffset, targetEleYOffset).build().perform();
    } finally {
      driver.quit();
    }
  }
}
结果为:
 拖放后
拖放后
如果我们想拖到A使得A的左上角和B的左上角对齐呢?大家可以拿个纸计算一下。然后试一下,最终的结果应该如下图:

release
松开鼠标。其实前面的dragAndDropBy也是先调用ClickAndHoldAction点住鼠标,然后MoveToOffsetAction移动鼠标,最后ButtonReleaseAction松开鼠标。我们也可以自己用上面的三个Action对应的函数实现拖放:
import org.openqa.selenium.By;
import org.openqa.selenium.WebDriver;
import org.openqa.selenium.WebElement;
import org.openqa.selenium.chrome.ChromeDriver;
import org.openqa.selenium.interactions.Actions;

public class release {
  public static void main(String[] args) {
    WebDriver driver = new ChromeDriver();
    try {
      // Navigate to Url
      driver.get("https://crossbrowsertesting.github.io/drag-and-drop");
      // Store 'box A' as source element
      WebElement sourceEle = driver.findElement(By.id("draggable"));
      // Store 'box B' as source element
      WebElement targetEle = driver.findElement(By.id("droppable"));
      Actions actionProvider = new Actions(driver);
      actionProvider.clickAndHold(sourceEle).moveToElement(targetEle).build().perform();
      // Performs release event
      actionProvider.release().build().perform();
    } finally {
      driver.quit();
    }
  }
}
比如上面的代码首先用clickAndHold点击A,然后moveToElement移动鼠标,最后release释放鼠标。
处理cookie
因为HTTP是无状态的协议,为了让服务器判断客户端是谁,服务器可能会让浏览器在客户端存储一下值。后续请求是浏览器会把这些信息回传过去,从而让服务器知道客户端是谁。
增加cookie
import org.openqa.selenium.*;
import org.openqa.selenium.chrome.ChromeDriver;

public class addCookie {
    public static void main(String[] args) {
        WebDriver driver = new ChromeDriver();
        try {
            driver.get("http://www.example.com");

            // Adds the cookie into current browser context
            driver.manage().addCookie(new Cookie("key", "value"));
        } finally {
            driver.quit();
        }
    }
}
获取某个cookie
import org.openqa.selenium.*;
import org.openqa.selenium.chrome.ChromeDriver;

public class getCookieNamed {
    public static void main(String[] args) {
        WebDriver driver = new ChromeDriver();
        try {
            driver.get("http://www.example.com");
            driver.manage().addCookie(new Cookie("foo", "bar"));

            // Get cookie details with named cookie 'foo'
            Cookie cookie1 = driver.manage().getCookieNamed("foo");
            System.out.println(cookie1);
        } finally {
            driver.quit();
        }
    }
}
获取所有的cookie
import org.openqa.selenium.*;
import org.openqa.selenium.chrome.ChromeDriver;
import java.util.Set;

public class getAllCookies {
    public static void main(String[] args) {
        WebDriver driver = new ChromeDriver();
        try {
            driver.get("http://www.example.com");
            // Add few cookies
            driver.manage().addCookie(new Cookie("test1", "cookie1"));
            driver.manage().addCookie(new Cookie("test2", "cookie2"));

            // Get All available cookies
            Set<Cookie> cookies = driver.manage().getCookies();
            System.out.println(cookies);
        } finally {
            driver.quit();
        }
    }
}
删除cookie
import org.openqa.selenium.*;
import org.openqa.selenium.chrome.ChromeDriver;

public class deleteCookie {
    public static void main(String[] args) {
        WebDriver driver = new ChromeDriver();
        try {
            driver.get("http://www.example.com");
            driver.manage().addCookie(new Cookie("test1", "cookie1"));
            Cookie cookie1 = new Cookie("test2", "cookie2");
            driver.manage().addCookie(cookie1);

            // delete a cookie with name 'test1'
            driver.manage().deleteCookieNamed("test1");

            /*
             Selenium Java bindings also provides a way to delete
             cookie by passing cookie object of current browsing context
             */
            driver.manage().deleteCookie(cookie1);
        } finally {
            driver.quit();
        }
    }
}
删除所有cookie
import org.openqa.selenium.*;
import org.openqa.selenium.chrome.ChromeDriver;

public class deleteAllCookies {
    public static void main(String[] args) {
        WebDriver driver = new ChromeDriver();
        try {
            driver.get("http://www.example.com");
            driver.manage().addCookie(new Cookie("test1", "cookie1"));
            driver.manage().addCookie(new Cookie("test2", "cookie2"));

            // deletes all cookies
            driver.manage().deleteAllCookies();
        } finally {
            driver.quit();
        }
    }
}
Same-Site Cookie属性
为了防止跨站Cookie攻击(CSRF),新版的浏览器可以设置cookie的SameSite属性,用于禁止在某个站点的页面里将cookie发送给第三方。关于这个属性可以参考Cookie 的 SameSite 属性。
我们可以将Cookie的这个属性设置成Strict或者Lax,代码如下:
import org.openqa.selenium.*;
import org.openqa.selenium.chrome.ChromeDriver;

public class cookieTest {
  public static void main(String[] args) {
    WebDriver driver = new ChromeDriver();
    try {
      driver.get("http://www.example.com");
      Cookie cookie = new Cookie.Builder("key", "value").sameSite("Strict").build();
      Cookie cookie1 = new Cookie.Builder("key", "value").sameSite("Lax").build();
      driver.manage().addCookie(cookie);
      driver.manage().addCookie(cookie1);
      System.out.println(cookie.getSameSite());
      System.out.println(cookie1.getSameSite());
    } finally {
      driver.quit();
    }
  }
}
注意:上面的代码需要chrome(80+version)或者Firefox(79+version),同时要求WebDriver的版本是4.X。
Chrome的开发者工具(Devtools)
Chrome的开发者工具(或者Firefox的FireBug)是非常有用的前端调试工具,我们后面写XPATH时也经常需要使用开发者工具来查看Dom树的结构。我们可以通过”工具”->”开发者工具”来启动它,也可以在网页的任意位置右键然后选择”检查(Inspect)”。启动后的开发者工具如下图所示:
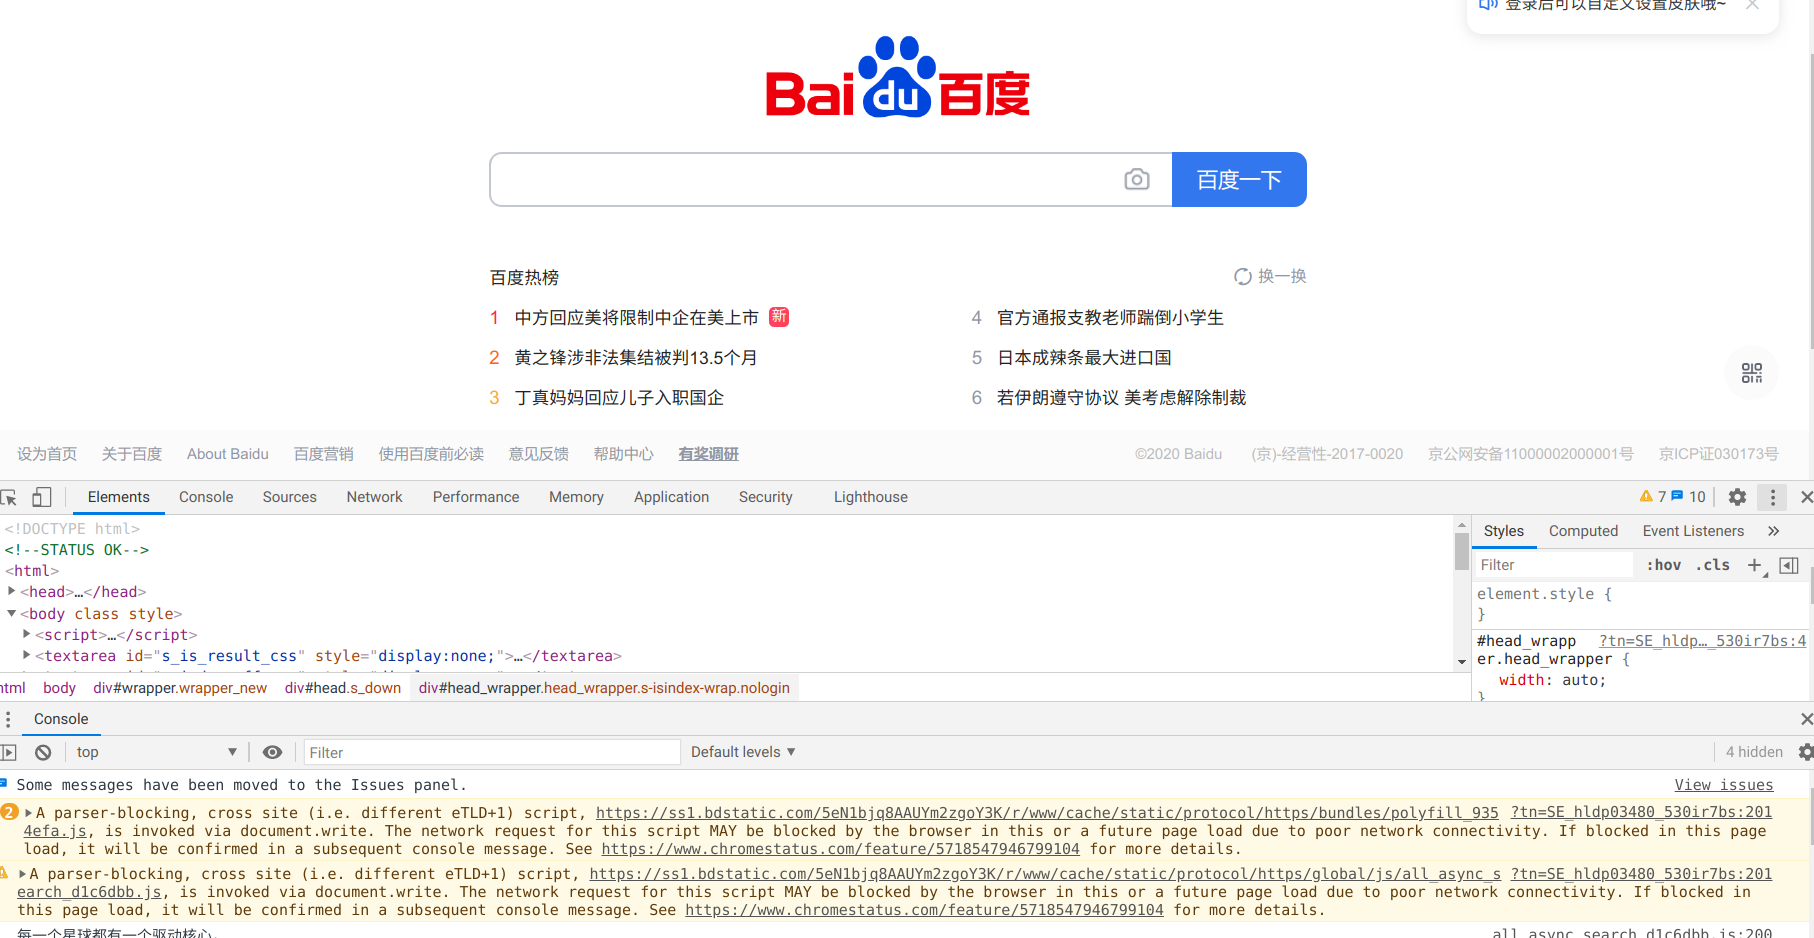
详细的使用请参考官方文档。我们暂时用不到查看网络,调试JS代码这些功能。我们需要的是查看DOM树,可以参考Get Started With Viewing And Changing The DOM。
WebDriver的新版本也在增加控制Devtool的API,以后也许我们可以通过WebDriver来控制开发者工具,不过目前最有用的一项功能是模拟经纬度:
import org.openqa.selenium.chrome.ChromeDriver;
import org.openqa.selenium.devtools.DevTools;

public void geoLocationTest(){
  ChromeDriver driver = new ChromeDriver();
  Map coordinates = new HashMap()

  {{
      put("latitude", 50.2334);
      put("longitude", 0.2334);
      put("accuracy", 1);
  }};

  driver.executeCdpCommand("Emulation.setGeolocationOverride", coordinates);
  driver.get("<your site url>");
}
另外根据这篇文章,我们可以用Devtool实现一些非常有用的功能:
- 全屏截屏
- 如果一个页面太大在一个屏幕显示不了,有滚动条,则可以用这个实现截屏
- 把页面转换成PDF
- 在页面load之前注入一些js代码
- block掉某些请求
- 保存/恢复所有站点的cookie
- 透明截屏
注意:这些功能需要Selenium WebDriver 4.X,目前4.X还处于alpha版本状态,最新的还是alpha-7,如果是maven,可以引入:
<dependency>
    <groupId>org.seleniumhq.selenium</groupId>
    <artifactId>selenium-java</artifactId>
    <version>4.0.0-alpha-7</version>
</dependency>
XPATH教程
其它常见问题
页面加载超时设置
有的时候某些网页出现问题(或者我们的网络有问题),则get()默认会一直等待下去。注意:不用跟前面的等待混在一起了,等待是我们获取某个元素时的等待时间。
我们可以设置页面加载的超时:
driver.manage().timeouts().pageLoadTimeout(30, TimeUnit.SECONDS);
设置了超时后如果加载超时会抛出TimeoutException异常,如果我们想忽略它(比如我们知道某个广告的代码加载会超时),那就需要catch这个异常。
我有一段HTML代码怎么让WebDriver加载
一种方法是保存到一个文件里,然后用”file:///home/lili/test.html”加载。另外如果你不想要一个文件的话也可以这样:
String html=.....
driver.get("data:text/html;charset=utf-8," + html);
怎么得到一个WebElement的所有孩子
如果我们只想得到它的所有Element(
WebElement div=....;
div.findElements(By.xpath("./*"))
如果想得到所有的子节点,包括文本和comment等,比如某个DIV下面的所有(直接)子节点,那么xpath是”//DIV/node()”。不过如果直接运行:
WebElement div=....
List<WebElement> children=div.findElements(By.xpath("./node()"));
则会抛出异常:
org.openqa.selenium.InvalidSelectorException: invalid selector: The result of the xpath expression "./node()" is: [object Text]. It should be an element.
原因是WebElement对于的是<h1>、<div>这些Element,而text node是无法转换成Element的。如果要得到它们只能执行JavaScript:
String ret=javascriptExecutor.executeScript("var s=document.evaluate('//div/text()', document, null, XPathResult.STRING_TYPE, null ).stringValue; return s;");
但是用JS写起来很麻烦(可能是我的JS水平不够),另外一种方法就是用WebElement.getAttribute(“outerHTML”)拿到所有的HTML,再用第三方的XPATH工具比如NekoHtmlParser来parse。
怎么输入Ctrl+A
参考这个,方法为:
WebElement.sendKeys(Keys.chord(Keys.CONTROL, "a"));
在Ubuntu上的Headless模式
使用Chrome的一个好处是它有Headless模式,也就是可以运行在没有图形界面的服务器上。使用Headless的方式也很简单,只需要这样构造Driver:
ChromeOptions options = new ChromeOptions();
options.addArguments("--headless");
options.addArguments("--disable-gpu");
WebDriver driver=new ChromeDriver(options);
当然也需要在机器上通过命令行安装Chrome,详细可以参考这篇文章。这里简单列举一些安装命令:
# 需要番习习土啬
$ wget https://dl.google.com/linux/direct/google-chrome-stable_current_amd64.deb
$ sudo dpkg -i google-chrome-stable_current_amd64.deb
- 显示Disqus评论(需要科学上网)